Achieving the Perfect First Layer
- gCreate Team
- Sep 20, 2019
- 5 min read
Why is the First Layer So Important?

The first layer of your 3D print is easily the most important step in ensuring that your final product comes out perfect.
Not only does it look great but it's setting the stage for the rest of the layers that then sit on top of it. If you have a poor or sloppy first layer there is a good chance that those imperfections will echo through each layer that sits on top of it. It's key for those toolpaths to be smooth and evenly spaced.
The First Layer is also key in Bed Adhesion. Making sure that your Z-offsets, extrusion widths, and bed leveling are set just right help ensure that your prints don't peel or curl. Big flat prints with larger the surface areas are much more susceptible to curling and warping, so making sure that first layer is really stuck to the bed will drastically increase the success rate of your prints.

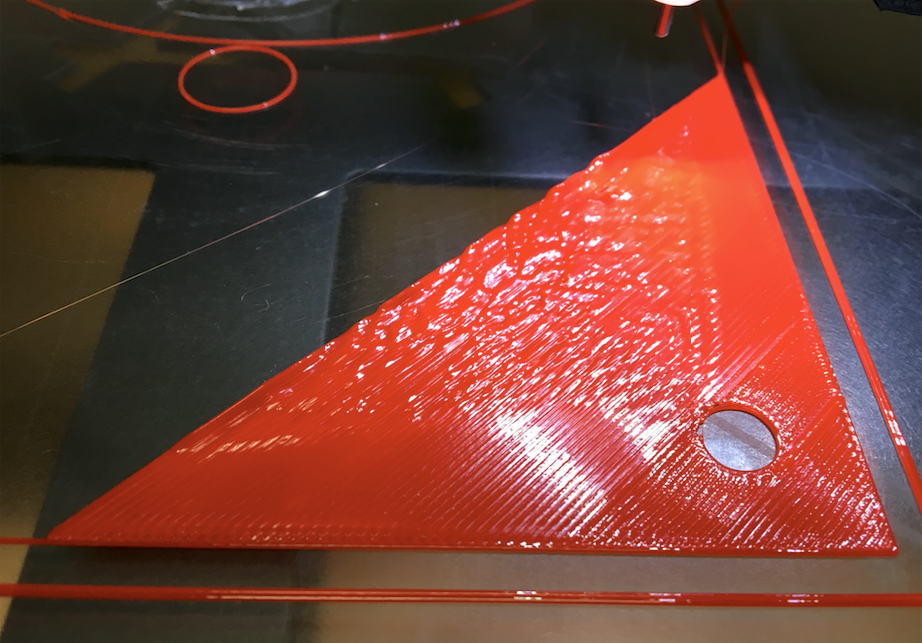
Last but not least, the first layer is key for aesthetics and surface finish! When your first layer goes down poorly, it's noticeable...very noticeable.
A bad first layer can be a major bottleneck when it comes to the aesthetics of a print. When you get that first layer to lay down smoothly and perfectly it can easily be the smoothest and most clean face of the whole model.
It's fairly common practice to place the most aesthetically important surface face down on the bed to achieve a smooth and sometimes glossy (if printing on glass) surface finish.
Slicer Settings
There are some basic settings in Simplify3D that can help you on your journey to achieving the perfect first layer. Most of these settings can be found in your slicer of choice, but for this tutorial, we are going to be working with Simplify 3D.
Extruder Settings The first few settings we have to look at are in the Extruder Tab:

Nozzle Diameter
All gMax 3D Printers come with a 0.5mm Nozzle pre-installed on a genuine E3D V6 hotend but there are many different nozzle diameters available (our Nozzle Fun Pack comes with nozzles ranging 0.4mm to 1.0 and comes free with every gMax 2!) Just make sure it is set to the one you have installed on your printer. Once you have this set you won't have to change this again, unless you swap the nozzle to a different diameter.
Extrusion Multiplier
The default Extrusion Multiplier is often set to 1 but we've found that on the gMax printers its optimal at around .97. The best way to find the right settings for your printer is through trial and error.
Extrusion Width
The width at which your nozzle is extruding plastic is one of the most important puzzle pieces to getting the perfect first layer. The width you choose is determined by the diameter of the nozzle you're using. We try to steer clear of the Auto Extrusion Width option in Simplfy3D and have found for the .5mm Nozzle on the gMax it is best set at .5mm. This setting can vary depending on the printer and settings you are using.

Layer Settings The next group of settings can be found in the Layer Tab of Simplify3D. These settings are very important because they apply to only the first layer of the print. They modify the existing settings by either increasing or decreasing the value for just the very first layer.

First Layer Height and First Layer Width
These settings will increase or decrease the height and spacing of the extrusion lines on the first layer. When you're printing the first layer you want the lines to be close enough together that you don't get gaps or holes but not so close that the lines overlap each other and the nozzle scrapes away what was just put down (LEFT). Finding the right balance of height to width can be a bit tricky but we suggest starting somewhere around 125% for both First Layer Height and First Layer Width.
First Layer Speed
With anything, taking your time can improve quality and dramatically increase your success rate. It is no different when it comes to your first layer. Slowing everything down allows more time for paths to bond, more precise extrusion of material, and better bed adhesion. "Don't rush" should be your mantra while mastering the art of the first layer. This can be up to you but generally, the slower the better (although more often than not we find that 60% speed is pretty reliable, but for smaller prints or certain materials like 85A TPU, we have gone as low as 30%).


Nozzle Temperature
It's not always necessary but it can help to adjust your "Per-Layer Temperature Setpoints" to be slightly hotter for the first layer than the rest of the print. This can be done in the Temperature Tab. Temperature Setpoints allow you to set different layers to be different temperatures. This is very useful if you are having trouble getting that first layer to stick properly.
All you do is create a set point for the first layer 5-10 degrees higher than your desired print temp than creating a second set point for layer 2 at the original temperature you want the rest of your layers to print at. It's not necessary but it can help in many different situations.
Printing
Now that you have your model sliced the only thing left to do is print! This section will go over the important last steps you need to take once the gcode is loaded in the printer.
Bed Leveling
Although it should do this automatically for you if you are using a gMax printer, this is a crucial step for any print on any printer. Bed leveling allows the printer to map out the bed of your printer so your nozzle is at the same height no matter where it is on the print bed. This means that your nozzle will extrude material evenly whether you are printing in the middle of the bed or the back corner. A bed that is not properly leveled can cause many problems so it's always good to double check.
Live Z-Adjust
Live Z-Adjust (formerly known as "Babystepping") is the final step you should take for getting the perfect first layer. This is only done right after you press print. Live Z-Adjust is micro adjustments of the nozzle (up and down) once the print has started (or is just about to start) so you can fine tune down to the thousandth of a millimeter exactly how far your nozzle is from the print surface. To save this adjustment you just need to go to Menu > Control > Store Settings. Otherwise this value is not permanent and returns to 0.000mm as soon as a new print starts.
Adjusting the value to a negative such as -0.150 will bring the nozzle closer to the bed and increase the extrusion width.Adjusting the value to a positive such as 0.060 will bring the nozzle farther away and thin out the extrusion width.
It's helpful to Increase or decrease in 0.050 increments until you start to see the material lay down the way you want. This can be tricky getting it just right but taking your time to get it perfect is well worth the extra effort.
The picture below shows three situations you can run into while printing and you'll have to adjust you Live Z-Adjust accordingly. When the nozzle is too low (LEFT) it can scrape on the bed and cause damage to the bed as well as clog your hotend.When the nozzle is too high (RIGHT) the extruded material won't stick to the bed or will print above the actual build surface.When the nozzle is just right (CENTER) a thin slightly flattened bead of material will be extruded from the hot end sticking to the build surface.

Conclusion

The first layer sets the stage for the rest of your print. You wouldn't build a house on un-level ground without first laying a foundation, would you?! Getting the perfect first layer can take some work but if you follow these steps and take your time to master all of the settings and techniques the quality of your prints will increase.


Comments