How To 3D Print Full Metal - TVF Copper and Bronze On The gMax 2 PRO - Part 2 Debind, Sinter, Polish
- Gordon LaPlante
- Oct 25, 2022
- 4 min read

Updated: Oct 26, 2022
Who doesn't want to 3D print real metal functional parts? With the Virtual Foundry metal filaments and a gMax 2 PRO 3D printer, now you can. We experimented with 3D printing bronze and copper and the results are amazing.
In part one we went over slicing tips, printer setup, and the printing results. In part two it's time to debind and sinter the part. Then polish and even mill the pieces to see just how solid they are!

Overview
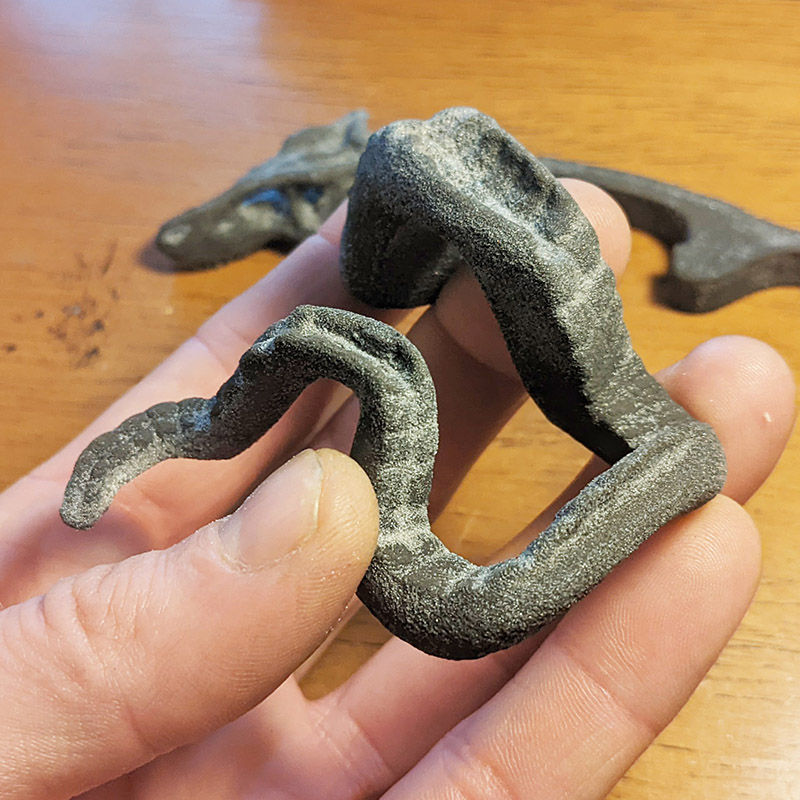
You may recall in part one we used the gMax 2 PRO 3D Printers and tested six different models. Once the prints are finished they are considered "green".

Green parts still have the plastic binder holding the metal particles together and this binder has to be removed. Debinding can be achieved either with chemicals or by heat in in a kiln.
Debind in a Programmable Electric Furnace
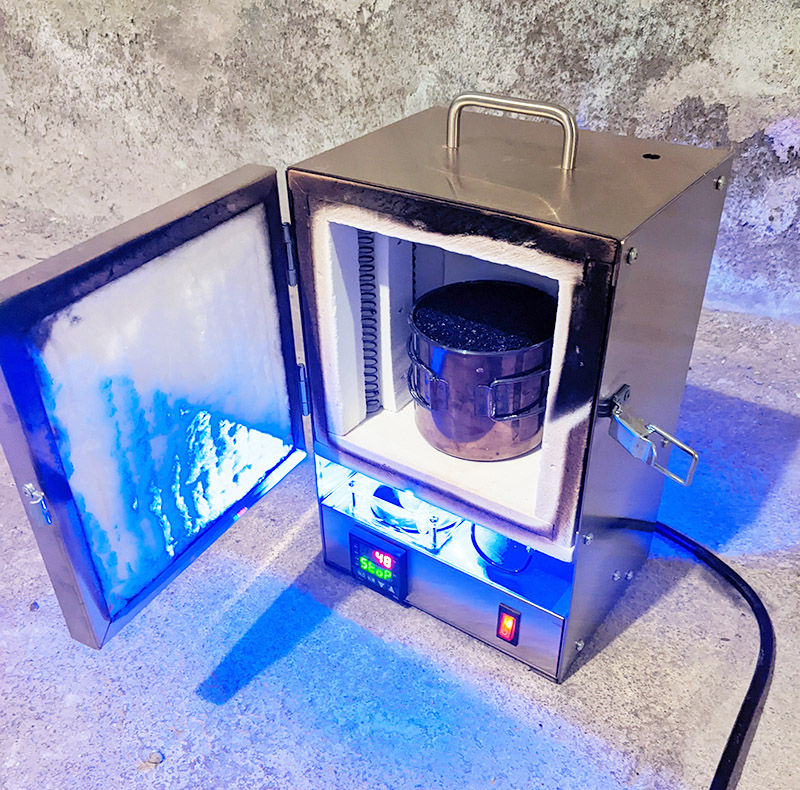
You must use a programmable kiln to burn out and sinter the parts due to the specific ramp up and holding times required.

We used the Tabletop Hi-Temp 2200 Degree Electric Burnout Oven by PMC Supplies. The kiln can be programmed with up to 30 different steps which works great for our needs.
Make sure your furnace has a vent hole for the debind process
Both the bronze and copper filaments use the same heating temperature and timing during the debind process. Make sure to visit The Virtual Foundry help section for the most up to date debind and sinter times.

We used a stainless steel camping cup as a crucible and put in several parts at once. Just make sure when you add the refractory (Al2O3), the parts are not touching the sides of the crucible or each other.

The debind process lasts about 12 hours and has specific ramp up times and temperatures.

From TVF website:
Debind:
BC7: Ramp furnace at a rate of 55.6°C (100°F) per hour to 482°C (900°F)
BC8: Hold at 482°C (900°F) for 4 hours*
BC9: Let furnace cool to room temperature
If you are using the PMC programmable kiln, the program goes as follows:
Copper and Bronze Debind:
C01 50 T01 480
C02 900 T02 240
C03 900 T03 -121
Once the debind process is finished and the parts are cooled remove the parts and clean off the refractory.
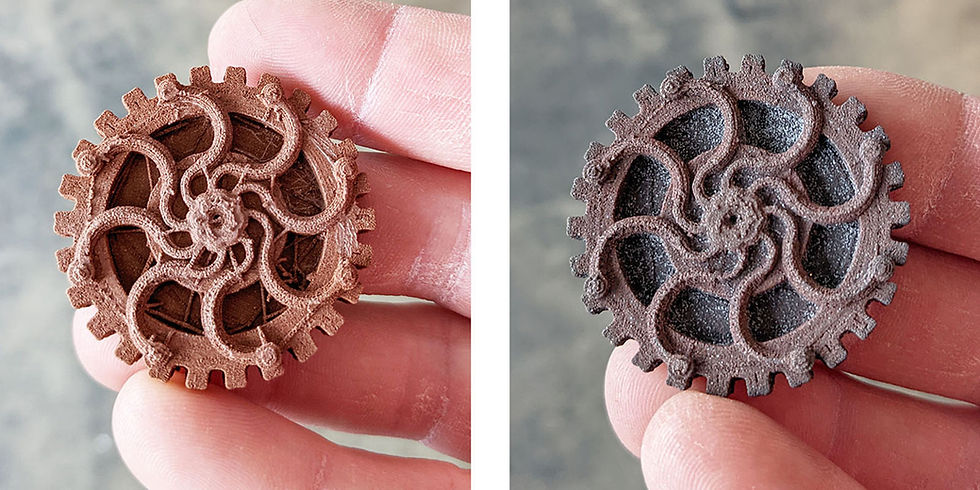
These parts are now considered "brown" parts and while still slightly brittle, they should hold up to cleaning. We used a brass metal brush to brush away all the refractory and examine the parts. Unfortunately, the copper medusa pendant broke apart as it was removed from the refractory.
Notice how much some of the bronze prints shrank since they only had 90% infill. The top portions shrank substantially. In comparison, the copper parts with 100% infill had less shrinkage.
The copper part below was about 15 grams before the debind and 13 grams after.
The part dimensions
Before debinding:
40mm x 40mm x 5mm
15.5 grams
After debinding:
39.34mm x 39.34mm x 4.5mm
13 grams
Time to Sinter the Parts
Once you have cleaned and inspected the parts, it's time to sinter them which will fuse the metal together. Sintering the parts is tricky as you have to reduce the amount of oxygen that can reach the part causing oxidation.
Sintering temperatures are much higher than debind temperatures and according to TVF they "recommend at least 70-100° of headroom from the maximum oven temperature" to avoid damaging the kiln. Both copper and bronze should sinter fine in our oven.
We used the same crucible to sinter the parts and according to The Virtual Foundry help section :
Bronze will sinter at 885°C (1625°F)
Copper will sinter at 1052°C (1925°F)

Fill the crucible with the talc power to support the part and make sure to add the sintering carbon on top.
The carbon will keep oxygen away from the part as it sinters to reduce oxidation. Try to cover the top with a metal cover or stainless steel foil to help preserve the sintering carbon.
From TVF Website:
Sinter:
BC20: Ramp furnace at a rate of 111.1°C (200°F) per hour to the Sinter Temp
BC21: Hold at the Sinter Temp for 5 hours
If you are using the PMC programmable kiln, the program goes as follows:
Copper Sinter
C01 50 T01 513
C02 1925 T02 240
C03 1925 T03 -121
Bronze Sinter
C01 50 T01 458
C02 1625 T02 300
C03 1625 T03 -121

Post Processing - The Fun Part!
Once you have sintered and inspected the parts, it's time to clean them up and polish them. This is the most fun part of the process as the parts really come to life.
Start by cleaning the parts with a brass or stainless steel wire brush. This is a useful step because you can inspect the parts to make sure no cracks formed which might cause the part to break.


After the parts have been cleaned by hand comes the fun part.
We recommend using a metal wire wheel on a bench grinder to polish the parts. You will see them change from a dull patina to a polished finish!
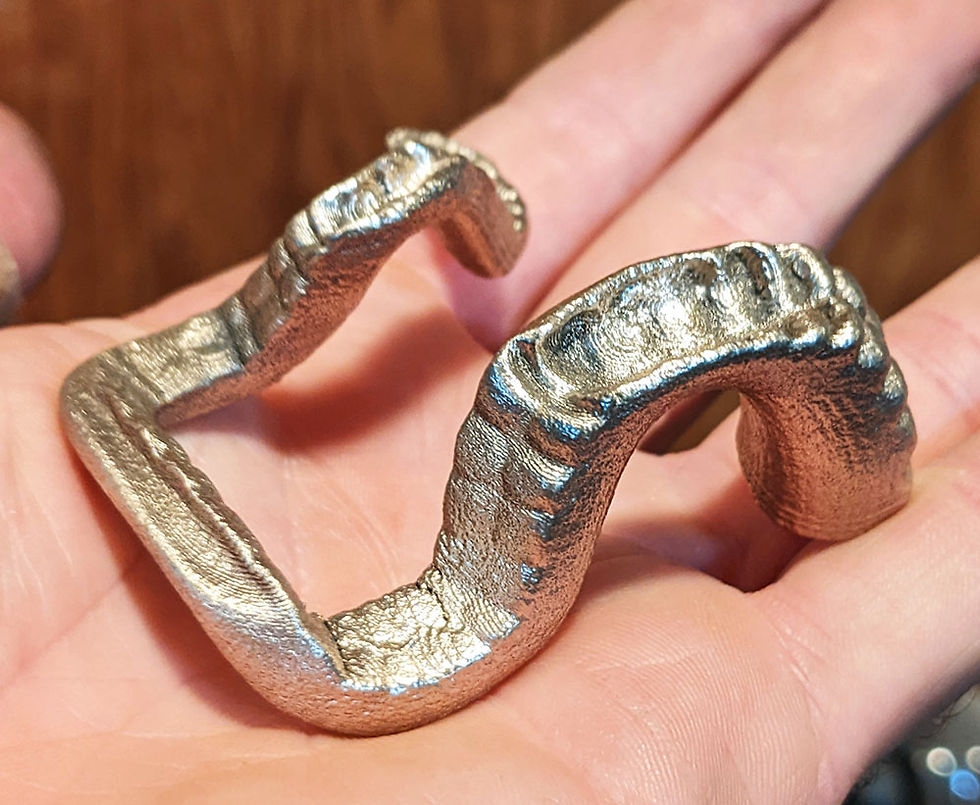
We found the bronze parts had a bright yellow finish almost like brass and the copper had a great color as well.
We used a wire wheel to get into all the cracks we could reach and even though the medusa broke, it still sintered into a solid metal part and polished beautifully.


Can the Parts be Milled?
Yes they can! If the debind and sintering process finished correctly, you will be left with solid metal parts. Just inspect them for any cracks.
We tried face milling the back of the bronze lion door knocker to see just how solid it is. After clamping it down we did several passes to make sure we were really seeing the inside of the part.

The results were actually pretty shocking as the part only has very minuscule pockets.
If we milled further they might have disappeared. In total we milled the face down about 1mm.
Conclusion
3D printing using The Virtual Foundry metal filaments opens up a lot more options for strong functional metal parts. 3D printing can produce objects that would otherwise be difficult or impossible to make using other technologies and the results are impressive. The gMax 2 PRO 3D Printer printed the metal parts with ease and we hope you try it out.
The print, debind, and sintering processes are well within reach for consumers outside the controlled industrial shops and it's a lot of fun seeing the results. We found the process to be fairly straightforward however every model will have different challenges.
We plan on experimenting a lot more with metal 3D printing, with stainless steel and aluminum next. We hope this article was useful and make sure to tag #gCreate and #TheVirtualFoundry if you print your own metal parts!


Comments