Using Water Soluble Filament (PVA) As Support Material On Your gMax 2 PRO 3D Printer
- Gordon LaPlante
- Jul 13, 2021
- 5 min read
Updated: Aug 27, 2021

Depending on your design, you may need support under certain parts of the model for it to complete. Using our 2in1 dual extruder on a gMax 2 or gMax 2 PRO, you can use water soluble support material (PVA) resulting in a much cleaner surface finish and easier support removal. This guide is to help you understand when to use PVA and how to set it up in PrusaSlicer 2.3.1
What is PVA?
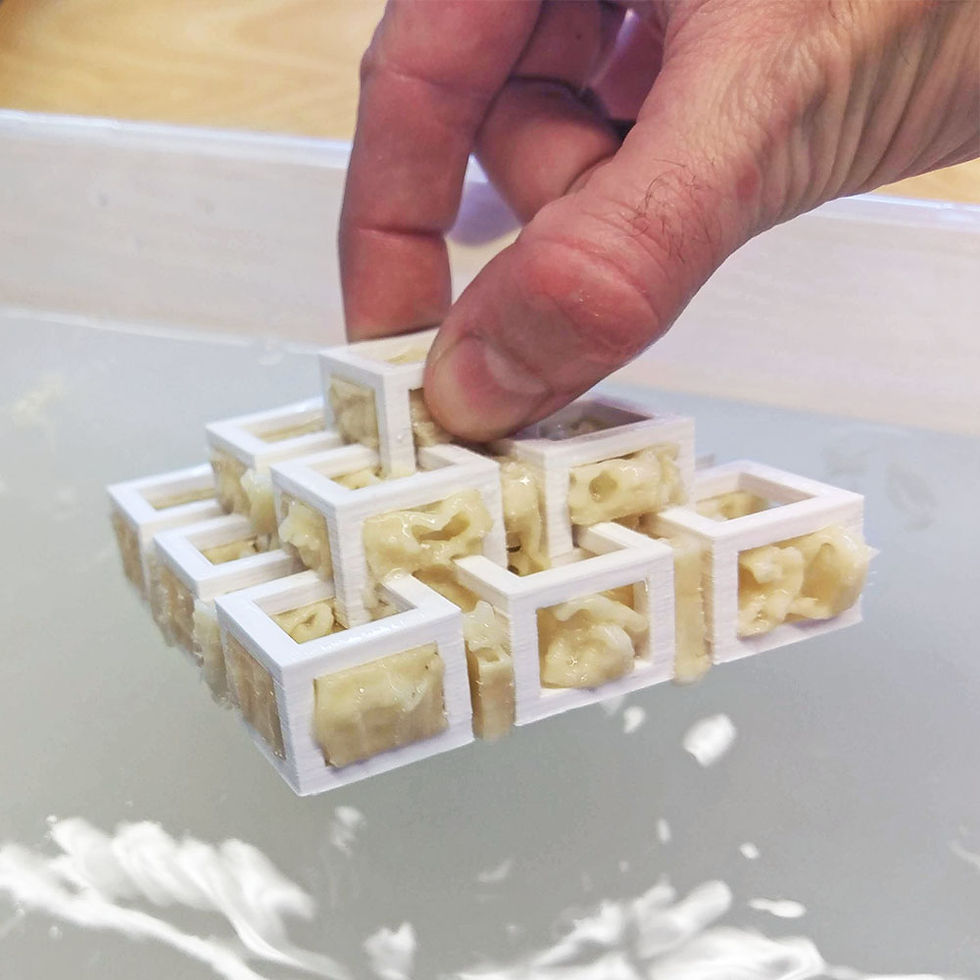
Poly(vinyl alcohol) (PVOH, PVA, or PVAl) is a water-soluble synthetic polymer. It is used in papermaking, textile warp sizing, as a thickener and emulsion stabilizer in PVAc adhesive formulations and a variety of coatings. It is colourless (white) and odorless. It is commonly supplied as beads or as solutions in water.
Is PVA Safe?
Generally PVA has low toxicity and is considered safe. It is also biodegradable and solutions with up to 5% of PVA (ie. Mixed with water) are considered safe for fish.

PVA is also hygroscopic meaning it will absorb water so ideally you want to store PVA in a dry place with desiccants to reduce moisture. You can also use a filament dryer or place in the oven for a few hours to dry out prior to printing.
We have found that the gMax printer can still print “saturated” PVA however the finish will not be as nice and you will hear crackling sound as the moisture burns off during printing. You also risk clogging the extruder if it's not dried out.
PVA Everywhere or Just the Interference Layer
In some slicing programs, you can define different extruders for the support material and the interference layer between the support material and the object.
Depending on your design, this can help reduce PVA waste by only printing the interface layer with PVA and the rest of the support with PLA.


In Simplify3D the setting can be found under the Support tab then setting support to "Left Extruder" and Dense Support to "Right Extruder"

Of course this won't work in situations where the PLA support will be trapped by the model and you can remove it.
The model to the right would have support inside that would be very hard to remove so you would use PVA for all the support.
Dual 2in1 Settings in PrusaSlicer
We will be slicing our model in PrusaSlicer using our tested dual 2in1 configuration settings and the PLA / PVA profile.
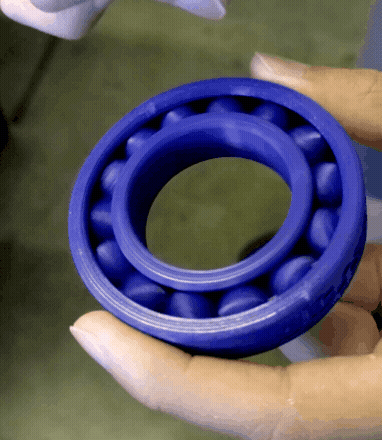
You can download the bearing model and PrusaSlicer profile here:
Selecting the Correct Profile

Open PrusaSlicer and make sure you have the gMax 2 PRO profiles loaded.
Under the "Print Settings" drop down select "0.20mm - Dual 2in1 PLA with PVA Support".
For the second filament, select "Generic PVA"
Load the model
When you first load the model you will see a purge tower automatically generate. The purge tower can be moved around the build plate by dragging it. Make sure the extruder will not hit the purge tower and it has enough room.

You may have to increase the purge tower size depending on the brand of PVA you are using. We recommend eSun or Gizmo Dorks PVA. The default settings are adequate in most situations.
Paint On Supports
PrusaSlicer has a very useful tool for painting on your model to put support exactly where you need it. For the bearing model we used this tool to remove all the support at the top of the model and front text since it wasn't needed.
Select your model then click the "Paint on Support" icon.

For our example we first used the "Autoset by angle" function to put support with a threshold of 65° C.
Then we used "Shift + Left Mouse Button" to remove the support where it wasn't needed until only the bottom had support. This can be helped by adjusting the clipping view as you're painting.

Support Settings
Click on "Print Settings" then "Support Material"
Note: Make sure to deselect "Auto generated supports" if you painted on your own support or it will still put support material everywhere.
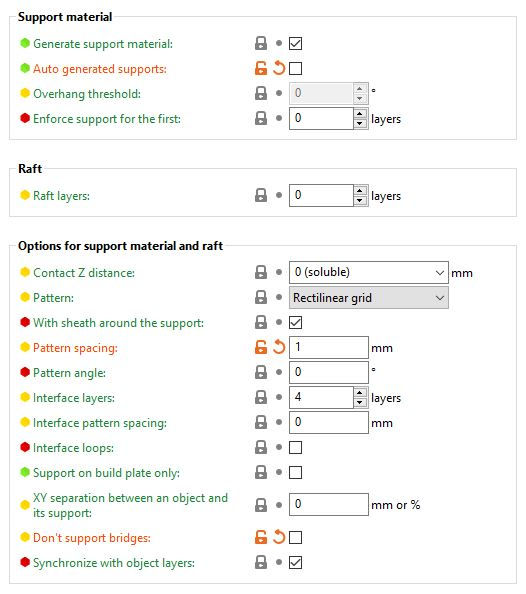
When using PVA, you may have to tweak the settings slightly depending on the model and where the support is located.
Generally the settings to the right will work for most situations. Since this particular model is small, we lowered the "Pattern Spacing" to 1.
If you require a solid block of support set "Pattern Spacing" to 0. Also for the best surface finish we recommend using 4 Interference Layers or more.
Our profiles have the temperature of the PVA set to 195°C and this may have to be adjusted +-15° C depending on your brand. That can be found on the "Filament Settings" tab just make sure to pick Generic PVA from the dropdown menu.
Slicing the Model
If everything was set up correctly, you should see support only at the bottom of the model as well as in the purge tower.
Make sure to always review the layers using the vertical slider on the right side of the preview window to ensure it sliced properly.
If you set the "View" to "Feature Type" and under "Show>Options" Turn on "Legend/Estimated Printing Time" you can see how much time each feature takes to print.

Starting The Print + Tips To Get It To Stick
If you are using a cold acrylic bed, you may need to add glue stick to get the PVA to properly adhere to the bed. We found the purple elmers glue sticks work very well.
If you are using the gMax 2 PRO G10FR4 heated build plate, set the bed temperature to 60° C.
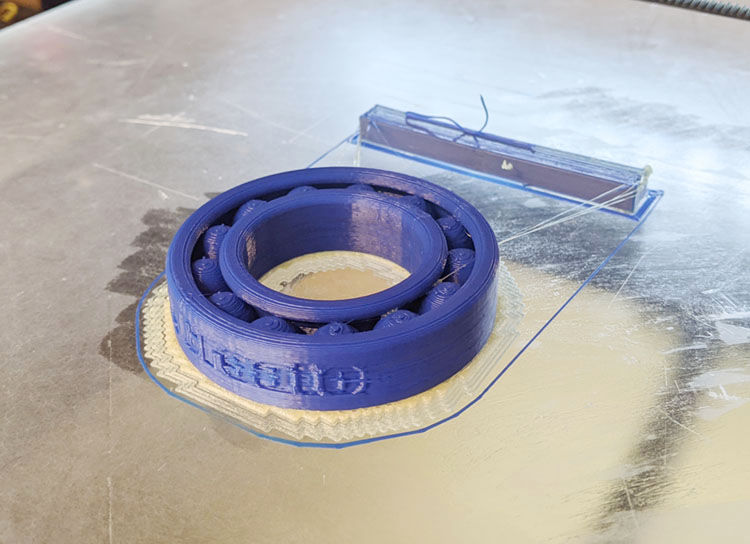
Level your bed and preheat the nozzle.
Insert the PLA in the left side of the extruder until it comes out the end.
Insert the PVA in the right side until you feel it hit the PLA inside the hotend then pull it back out about 1/2". If the PVA is initially inserted too far it could cause the PLA to bind as it starts printing.
Start your print and babystep the first layer accordingly.

PVA Dissolve Times
The dissolve times for PVA vary by brand, water temperature and density of the support. Obviously large dense chunks of support will take much longer to dissolve.
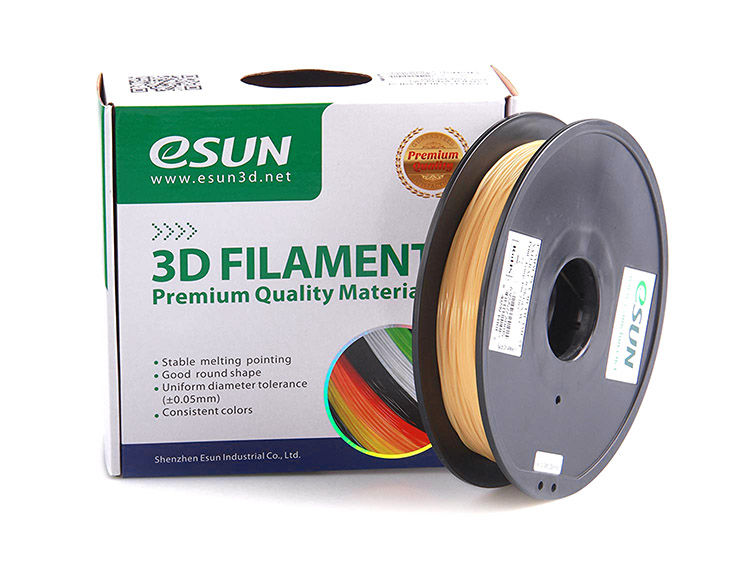
For this article we used eSun PVA and the material was about 25% dissolved after 20 minutes or so. We recommend eSun PVA for the gMax 2 PRO 3D Printer.
It was dissolved enough to fall off the model in 3-4 hours.
To dissolve the fastest it was recommended to use warm water and agitate it every few hours. We also find replacing the water with clean warm water and rinsing the parts speeds up the process.

What Materials Work with PVA?
We have had great success using PVA with PLA and PLA composites (like woodfill). Some brands claim their PVA will also stick to PETG and similar materials. However, we had less success with them and multiple online 3D printing articles confirm that PETG does not work well with PVA. This is not because of the 3D printer you use, but the material properties. Therefore, we recommend only using PVA as a support material for PLA.
For higher temperature materials you can use HIPS, which dissolves with D-limonene. however this is less safe than working with plain water.
Several other companies, such as ColorFabb, have developed custom filaments for support materials. Their DPA-100 adheres very well to PETG, PLA, ABS and higher temperature materials per their testing.
Happy gMax Printing!




Comments